Tuesday, July 31, 2007

Cherry...no the other one

It is fitting the first tomato entry into this chronicle of the season would be for the cherry tomato. Round, oblong or pear-shape these petite gems come to market first, and start to satisfy my need (and I mean need) for sweet, juicy tomatoes. After, a year of mealy, flat red orbs showing up in the kitchen I require the reassurance that all is okay. As with any tomato I will never refrigerate them nor will I ever buy a tomato that comes from afar when in the yard is a vine dangling with the jewel of the summer.

In the farmer’s market there is a myriad of colors and sizes to play with try a Sunkist or cherry Cherokee. It does not matter they are all interchangeable, and most definitely put in their place those prefect specimens we suffer all winter truly have no place on our plate.


Black Eyed Peas and Cherry Tomatoes - yields 8 serving

1-1/2 cups black-eyed peas - soaked overnight
3 leeks - whites only, washed and blanched
1/2 cup garlic chives - chopped
2 heaping tablespoon Dijon mustard
2 pints cherry tomatoes
1/2 cup chopped Italian parsley - leaves only
2 tablespoons Balsamic vinegar
Salt and black pepper to taste

In a one quart pan cook the beans completely covered in water over a simmering heat for approximately 40 minutes. Drain the peas, and while they are still hot toss with the ingredients, save the Balsamic vinegar. Let the mixture sit for 10 minutes, and then add the vinegar. By letting the mixture sit you are allowing the mustard to infuse its flavor into the warm peas without getting lost in the vinegar. Enjoy this dish hot or cold.


Red and Yellow Marble Salad - yields 8 servings

1/4 pound baby red potatoes
1/4 pound baby Yukon gold potatoes
1/2 cup extra virgin olive oil
1 pint red cherry tomato - halved
1 pint yellow cherry tomato - halved
1 green chili - diced ( such as jalapñeo or serrano)
1/8 cup champagne Vinegar or White Wine Vinegar
1 lime - zested and juiced
1 cup tightly packed Arugula leaves - roughly chopped
Salt and black pepper to taste

Pre heat the oven to 375 degrees.

Toss the potatoes with the oil and place on a baking tray. Cook the potatoes in the oven for 20 to 25 minutes until tender and slightly blistered.

With the potatoes still warm gently toss together with all the remaining ingredients in a bowl. Refrigerate 2 hours before serving.
Saturday, July 28, 2007

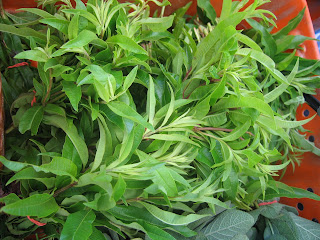
Lemon Verbena

There are certain fragrances that send me into sensory overload – lemon verbena owns the top position. Be it in the bar of soap slathering my body clean or the foamy scrub of a shampoo to more culinary applications that mystically scent a finished dish this ethereal herb makes me dizzy.

If I had a garden there would be a three feet high picket face glowing with a seasoned patina, and set as sentinels at the gate – two lemon verbena plants. I envision them standing erect aromatically frisking each person as they enter the garden. More to cleanse one of the outer world and welcome you into the heady, magically place where life gives life. Alas, for now, this is but a fanciful dream and I must rely on the skill and patience of the farmers that share my love of this most seductively, scented herb.

As the summer allows, me to use the herb fresh I find myself throwing leaves into a pesto; floating in hot water which later will be iced; hidden under the skin of a roast chicken. Then by mid-September I am collecting lemon verbena, and storing it in freezer bags for a winter’s callback. Yes, lemon verbena is on of those herbs whose leaves that can be froze for it is on the tougher side, and does not blacken and go mushy upon defrosting. Lemon verbena is so good to me.


Sweet Potato Braised with Lemon Verbena - yields 4 to 6 servings

2 Pounds Sweet Potatoes - peeled and sliced into 1/2" thick rounds
1/2 cup Lemon Verbena - leaves only
1 cup fresh Orange Juice
1/8 cup Champagne Vinegar
Salt and freshly ground Black Pepper to taste

Pre heat the oven to 350 degrees.

In an 8x8 baking dish shingle the sweet potatoes and verbena leaves in a single layer so that the verbena is sandwiched between the potato. Pour over the juice and vinegar, sprinkle with the and season with salt and pepper. Cover with foil, and place in the oven for 30 minutes or until tender. Serve hot.


Verbena Lime Slush - yields approx. 8 cups

1/4-cup fresh lemon verbena leaves
2 whole limes – cut in quarts, and center pithy membrane removed
1 1/4 cups sugar
1 cup water
4 cups ice

In a blender process the verbena, limes, sugar and water together till smooth. Then start feeding in the ice until thoroughly blended. If the limeade gets too thick add some water. Serve immediately. For an optional kick add a splash of tequila.

Thursday, July 26, 2007

okra

I remember years ago when I tried my first okra. I was in Austin, Texas enjoying an extra long weekend frolicking on the lake; kicking it up along 6th Street and two-stepping to the musical blend that is unique to the city. At dinner, I was encouraged to try my first chicken fried steak that was blanketed in the heaviest white sauce west of the Mississippi. Then I brought to my lips a pickled okra – and yuck! It was slimy and chewy – it was nothing my mouth enjoyed feeling. Well, strike that vegetable off the list.

If you ever end up in southern Louisiana okra is destined to pass your lips. And it did. Gumbo changed my mind about that first experience, and gave me a better understanding on how to employ this African offering to the world.

Yes, there will always be a mucilaginous quality okra – knowing how to use it to your advantage is key. Its meeting with the tomato must have been one of the culinary epiphanies for the two play together so well. The sweet, acidic quality of tomato cuts the unfortunate goo that shrouds okra with such a negative connotation. The Indians of the sub-continent make a fabulous spicy curry stew; of course the iconic Cajun concoction known as Gumbo (which actually means okra) is luscious, and the simple fried application sits right in the lap of southern hospitality.

Buy small okra about 1 to 2 inches (the smaller ones are less slimy) in length that are a unblemished. Store in the refrigerator in a paper bag or a towel-lined bowl for three to four days.


Seafood Gumbo - yields 6 to 8 servings

2 tablespoons olive oil
2 tablespoons flour
1 small onion - diced
3 garlic cloves – crushed to a paste
1 russet potato - peeled and diced
1 tablespoon curry powder
1/2 teaspoon celery powder
1/2 teaspoon chili powder
1/4 cup balsamic vinegar
1/2 pound okra - washed, trimmed and sliced in thirds
3 cups crushed tomatoes
1 1/2 pound monkfish or cod fillets- cut into 1" cubes
1/2 pound shrimp – peeled and de-veined
6 scallions - diced
1/2 lemon - juiced
Salt and pepper to taste

Heat a heavy line 3 quart pot and add the oil and flour. Cook the mixture over a medium low flame until it is a dark golden brown stirring occasionally. Add the onions cooking until translucent. Add the garlic, potatoes, curry powder, celery powder and chili powder. Cook the mixture for a few minutes, keeping it moving in order not to burn the spices. Add the balsamic vinegar stirring to incorporate. Mix in the okra and crushed tomato, 1.2 cup of water and bringing the mixture to a boil. Reduce heat to a simmer, and cover; cook the gumbo for 30 minutes. Add the fish and shrimp, and bring the heat back up. Simmer another 10 minutes. Season with salt and pepper. Add the scallions and lemon juice just prior to serving.

Tuesday, July 24, 2007

Summer's Seducer......

The peach season starts in late May in the warmer sections of the United States and runs through late September. There are hundreds of varieties of peaches being cultivated, but one thing holds true for them all…they send out an alluring aromatic sortie alerting us to their ripeness. If you buy unripe peaches leave them at room temperature for a few days to allow them to develop their full sweet potential. There are a few foods I refuse to eat if not locally harvest ed - the peach is definitely one. If harvested unripe and then stored under refrigeration, as needed for transportation, the ripening process will be arrested resulting in flat tasting, mealy textured fruit. I use (if I must!) these “unfortunate underachievers” in braises and chutneys where their tart, sweetness can be put to good use. I also prefer to use these under-developed peaches when on their firm side when I grill peaches for a summer vegetable plate. Too soft and the peach will breakdown too quickly.

The peach has a fraternal twin, the nectarine, which is a natural deviation that results in a fuzz-less skin. After that the two fruits are indistinguishable with each having red, yellow or white flesh variations. The white-fleshed varieties are sweeter because there is a lower acidity to the fruit though as any peach or nectarine ripens the acid levels decreases allowing its sweet nature to come through.

Both the peach and nectarine start the season as a clingstone meaning the meat is adhering to the pit. Though by mid-season (late June/early July) we start to get freestone varieties where the pit easily comes away from the fruit. Anyone who has tried to half a peach knows the frustration of separating a clingstone from the meat.


Peach Cobbler - yields 8 to 10 servings


Cobbler Dough
2 1/2 cups flour
1-teaspoon baking powder
1/2 -teaspoon baking soda
pinch of salt
1/4-cup sugar
1-pint sour cream
2 teaspoons - vanilla
2 egg yolks

2 –1/2 pounds peaches – halved, and pits removed
2-tablespoons sugar

To prepare the cobbler dough combine the flour, sugar, baking soda, baking powder and salt. In another bowl mix the sour cream, vanilla and egg yolks until blended together. Add it to the flour mixture and mix to a sticky dough.

Pre-heat an oven to 375 degrees.

Butter a 13x6 inch oven proof baking dish. Place the peaches on the bottom and sprinkle with sugar. Drop by the spoonful the cobble dough over the peaches. Sprinkle additional sugar if desired, and bake uncovered for about 25 to 35 minutes or, until the top is golden brown. Serve warm or cold with a dollop of whipped cream or a scoop of vanilla ice cream.

Saturday, July 21, 2007

The reining king of scent

Let’s talk about the long reining king of herbs – basil. Originating out of the sub-continent this fragrant leaf seems to find it difficult to locate a nose that views it as a foe. While we, the consumer, find it a pleasant culinary experience the plant itself does not appreciate being pulled from its earthy home. It wilts and browns quickly…alas. I try to always buy my basil from a farmer’s market as fresh as possible and I store it in a jar filled with a little water in the refrigerator as I would for cut flowers. Though be aware you will be lucky to get 3 days of perkiness. I usually take whatever leftover basil leaves there are and puree them in olive oil, and store it in a jar in the freezer. I will feed this jar all summer long so come winter I will have pungent basil paste to use later in the year.

Don’t be limited by the ubiquitous common basil – there is a full spectrum of redolent basil to excite more than your nose. Thai basil has a decided cinnamon note; lemon basil offers a lovely complexity; bush or fino basil has a small, pointed leaf that delivers a huge bang for its size. I use them all interchangeably allowing my purchase to be dictated more by a capricious desire then the demand of a recipe.


Thai Inspired Dressing - yields approx. 2 cups
1/2 cup packed basil - leaves only
1/4 cup cilantro - washed and leaves only
1/4 cup mint - leaves only
1 stalk lemon grass - bottom third
3 Asian red chilies - diced
1/4 cup Ketcup Manis (or Low-Sodium Soy Sauce)
1/4 cup Thai fish sauce
1/4 cup olive oil (or Canola)
2 lemons - juiced
1/4 cup honey (or Rice Bran Syrup)
1/4 cup rice wine vinegar

Place all ingredients into a food processor and blend till very smooth. Store in an airtight container refrigerated for up to two weeks.

Use over noodles, grilled fish or poultry.

Thursday, July 19, 2007

Tomatillo

Tomatillos are one of those vegetables that seem to be shrouded in much confusion. It is not a tomato, though it can claim a familial relationship, nor is this botanical berry used as a fruit. A native to Mexico and found through the great plains of North America this cousin to the tomato, pepper, eggplant and potato is a fat little orb with a protective papery coat known as a calyx. Green tomatillos are the most commonly found, however, purple and yellow varieties show up in the market as well. They all should be firm and round with a deep coloration. Upon peeling the skin of the tomatillo will be tacky to the touch – they simply need to be washed. Rarely, the tomatillo is eaten raw – they have a rather sour note, and a mealy texture.

Prepare them by grilling, blanching or sautéing for a few moments before proceeding with them. Or, if you have the patience try slicing them and breading them like you would for fried green tomatoes. It makes a prefect hors d‘oeuvres.


Grilled Summer Corn and Tomatillo Relish - yields approx. 6 to 8 servings
4 ears of Corn - as fresh as possible
1/2 pound fresh tomatillo
1 tablespoon toasted sesame oil
1 medium red onion - diced
1 chili - seeds and membrane discarded; diced such as serrano or jalapeno
2 teaspoons ground coriander
2 tablespoons cider vinegar
1/4 cup chopped cilantro leaves
Salt and freshly ground pepper to taste

Clean the corn of its husk and silky hairs. On a very hot grill cook the corn to blister and lightly char. Carefully cut the corn kernels from the cob. Peel the husks from the tomatillos and wash. Roughly chop the tomatillo.

Heat a 4 quart sauce pan over a medium heat and add the oil. Add the onion and chili cooking until the onions become translucent 5 minutes. Add in the coriander and cook for 30 seconds longer. Add in the tomatillo, corn and cider vinegar. Reduce the heat to low and simmer, covered for 10 to 15 minutes. Mix in the cilantro and season with salt and pepper. Serve warm or cold over grilled chicken, poached fish or even try it as a side dish.

Monday, July 16, 2007

Watermelon Radish

I love when I can come across something new and interesting. About two years, here in the New York farmer’s markets, a variety of radish found its way to our stalls. By name alone I would have passed it by, I mean another radish. However, this member of otherwise a humble vegetable turned my whole world on a dime. Externally it is nothing special – round with a white coating and greened shoulders. Slice it in half and a saturated explosion of color that glows from soft pink to red to magenta assaults the very color spectrum.

The flavor on these visual gems offers a slightly spicy skin with a sweetening interior. Use them with roasts in lieu of turnips, or boil them for a usual tint to a mash.

Personally I like gently pickled where the acid of the vinegar or lemon juice works to intensify their color – like they are not deep enough.


Iced Radishes - yields 6 servings

2 bunches watermelon radish
2 lemons - juiced
1-1/2 teaspoons salt
1 teaspoon black pepper

Wash the radishes and trim off the greens.

Toss the radishes, lemon juice, salt and pepper together in a ceramic, stainless steel or glass bowl to thoroughly combine. Chill in the refrigerator for 30 minutes and serve very cold. Serve as part of a summer antipasto platter.

Saturday, July 14, 2007

Apricot

The quiet cousin in the family of summer fruits, the apricot, has a relatively short window of opportunity. During the heyday of summer, these Chinese natives are found throughout the entire temperate regions of the world, and where probably introduced into the United States by Spanish missionaries in the 18th century. Their slightly oblong shape always contains a pit, or stone, that is free – meaning that it is not fused to the flesh of the fruit and is easily removed. Its skin is pale yellow to newer varieties that have blushing cheeks, and when ripe their sweetness is trumpeted by a gentle scent and a slight give to its flesh. It is best to store them at room temperature to avoid a mealy textured apricot. Use whatever apricot presents itself in any recipe calling for them fresh. To remove the skin of the apricot cut into the base an “x” and then place the apricot into boiling water for 30 to 60 seconds. While the fruit is still warm peel the skin away – this technique works well for the apricot’s other relative: peaches and nectarines.


Stuffed Apricots - yields 10 servings as an appetizer
1-1/2 pounds apricot (approx. 20)
1 shallot – minced finely
2 teaspoon fresh thyme leaves - chopped
1 tablespoon basil leaves- chopped
1 garlic clove - finely minced
1/2 teaspoon minced lemon zest
1/4 pound blue cheese
Freshly ground black pepper to taste

Cut the apricots in half following the seam around from the top all the way around, and discard the seed. Hold on a platter cut side up.

In a clean work bowl mix the all the ingredients together to completely distribute except for the apricots.

Heap a tablespoon of the cheese mixture onto a half of an apricot. Garnish with chopped basil, and serve room temperature or cold.


Apricot, Blueberry and Cherry Compote - yields 8 servings
1/4 cup Water
1 pint blueberries
6 Apricots - halved and pit removed
1 pound Bing Cherries - pits removed
1/4 cup Sugar
1/8 cup Lemon Verbena leaves - minced

In a 2 quart sauce pan, add the water and all the other ingredients and bring to a simmer over a medium flame. Lower the flame and cook the mixture for 20 minutes. Serve hot or cold over ice cream, pound cake or angle food cake.

Wednesday, July 11, 2007

Corn

It is past the Fourth of July so in the Midwest the corn should be knee high. However, on either coast it is shucking season. You know the time of year when the fine silky hairs of corn litter the kitchen floor, or you spy your Dad, alone on the back porch, cleaning the corn. Yes, this is one of the iconic vegetables of the sun baked days of summer, and seems to figure into every cookout throughout our land. For now, lets just deal with corn-on-the-cob.

Everywhere I look I now see white and bi-colored varieties – which is great for salads and eating raw. Corn (the word comes from the German for cereal) older varieties, okay the yellow corn I had as a child, would start converting its sugars to starch once harvested. Hence, my Mom would cook her corn in a mix of water and milk with sugar to sweeten it, and for at least 20minutes! Today the newer hybrids retain their tender sweetness much longer, and I have taken to eating them raw or very quickly cooked. Though I do seek out the old fashion yellow corn on occasion for I like to puree it, and use it as a natural thickener in chowders and creamed corn.

When buying corn you must fondle the entire cob making sure it has a good girth. Inspect the tassel (the silky hairs at the top) they should be damp. Not decomposing nor should they be dry – these are signs of days off the stalk or miles trekked before it got to you. The habit we all have of stripping down some of corn’s husks is really not necessary if it felt firm and full it will be. The worm that may be having its dinner can very easily be at the bottom – hey, we all need to eat.


Grilled Corn and Sugar Snap Pea Salad - yields approx. 6 to 8 servings
4 ears of Corn - as fresh as possible
1/2 pound Sugar Snap Peas - cut in 1/3’s
1 tablespoon olive oil
1 small red onion - diced
5 scallions - roots discarded, then chopped
1 chili - diced such as Serrano or Jalapeno
1 teaspoon ground cumin seed
1/8 cup red wine vinegar
1/4 cup chopped Italian parsley leaves
1/4 cup chopped mint leaves
Salt and pepper

Peel the husks from the corn and remove on of the silky hairs. On a very hot grill cook the corn to blister and lightly char. Carefully cut the corn kernels from the cob.

Heat a 2 quart sauce pan over a medium heat and add the oil. Add the onion, scallions and chili cooking until the onions become translucent. Add in the cumin and cook for 30 seconds. Add in the sugar snap peas and cook for a minute to just shake-off the rawness of the peas. Remove from the heat and mix with the corn and red wine vinegar, parsley, mint and season with salt and pepper. Serve warm or cold.


Corn-ade – yields 2 quarts

6 corn cobs (corn kernels used for another dish)
1/2 cup sugar
3 limes – juiced

In a 4-quart saucepan bring 9 cups of water to the boil with the corn cobs and sugar. Cover the pot and simmer the mixture for 15 minutes on a very low heat. Remove from the heat and allow the liquid to cool – about 15 minutes. Remove the cobs and stir in the lime juice. Chill the corn limeade completely and serve in tall glasses over ice.

Monday, July 9, 2007

Now for something completely different

As a chef, artist, and simply someone who is curious I am continually seeking moments of inspiration – something to push me to the edge were I can teeter. One can never tell where or when that bolt of lighting will strike, and even more importantly if it will catch fire. Though it is more important to constantly try, and fulfill the ideas as they percolate up.

For the past few years I have had an idea, or more like a desire, to take popcorn and get it out of the dark of the theatre. The initial spark for me came on a trip to South America and a ceviche I had. Instead of the ubiquitous chips that usually accompany this citrus bathed fish dish there were giant popped corn nuts as its side. Brilliant I thought, and got more taught up with the popped corn than the wonderfully spiced fish I had in front of me as well.

I had a mission – how to use popcorn outside its known applications. Carmel corn; cheddar dusted; soaked in melted butter never really did it for me anyway. Then I thought about a panzanella salad and figured if stale bread could make a wonderful salad way not try the popped corn. Encouraged by the enthusiasm of a group of students this salad started to take form. To all our delight it worked, and the end result was an empty serving dish.


Popcorn Salad – yields 8 servings

1/2 cup popping corn
1/2-cup olive oil
1-pint cherry tomatoes – halved
1 fennel – halved, and cut paper thin
3 garlic cloves – finely minced
4 scallion – chopped
1 bunch radish – diced
1/4 cup white wine vinegar
1/4 cup roughly chopped basil leaves
Salt and freshly ground black pepper to taste

Heat a six-quart pot over a high flame, and add the popping corn and oil. Cover with a tight fitting lid, and move the pot over the flame to fully pop the corn.

After the corn as popped, remove the lid and allow it to cool.

In the meanwhile, in a large work bowl toss the tomatoes, fennel, garlic, scallions, radish and vinegar.

Once the popcorn has cooled toss thoroughly with the tomato mixture along with the basil. Season with salt and pepper and serve.

Friday, July 6, 2007

Zucchinis


Summer squash, otherwise more commonly known as zucchini is a soft skinned, trailing vegetable that first offers its flowers for culinary possibilities (June 19, 2007), and then matures a elongated, round or sun-burst shaped fruit to enjoy. Its botanical kin, the hard skinned pumpkin, acorn, delicata, spaghetti are still a season away. The entire family of squash has its roots in the New World, however, the variety we refer to as zucchini it is a European mutant that was not seen in the United States until early in the 20th century…most likely brought over with Italian immigrants.

I prefer to buy zucchinis that are small to medium in size for they have a smaller seed pocket and are not as water saturated. The larger ones for me are destined to become a soup. All the skins are these tender summer squashes are edible though some may have a slightly bristly coating that should be scrubbed free from the vegetable. They are a fasting cooking lot not needing for than 10 minutes – if that long.


Grilled Chicken Breast with Summer Squash - serves 6

6 halved Chicken Breasts - boneless and skinless
1 lemon - juiced
1/3 cup olive oil
4 plum tomatoes - quartered
24 Kalamata olives - pitted
1/2 cup capers - drained
24 small patty pan squash
2 large red peppers - roasted, skinned and seeded, cut into 1/2” thick strips
Salt and freshly ground black pepper to taste
1 cup Mustard Dressing (recipe to follow)

Pre heat an outdoor grill or stove top grill pan to very hot.

Toss the chicken with the lemon juice, salt, pepper and olive oil to coat. Place on the hot grill, and cook about 5 minutes. You want to get a good "scoring" -- that is, grill marks -- on the meat

Preheat the oven to 375 degrees.

Mix the tomatoes, olives, capers, squash and peppers together, and place in the bottom of an oven proof 12x9 inch pan. Lay the chicken over the vegetables. Pour on the Mustard Dressing and cook for about 15 minutes in the oven. To serve lift a chicken breast out of the pan along with the vegetables bedded underneath it. Spoon over some of the Lemon Mustard Dressing. This dish is wonderful over your favorite pasta or Green Rice (page….)

Lemon/Mustard Dressing - 1 cup

2 Lemons - juice only
2 tablespoons Balsamic vinegar
4 tablespoon Dijion mustard
salt and pepper to taste
3/4 cup extra virgin olive oil

Combine the lemon juice, balsamic vinegar, mustard,salt and pepper together, and then slowly whisk in the oil.


Stuffed Zucchini - serves 6

6 medium sized Patty pan squash or 3 small zucchini
5 ounces goat cheese
1/4 cup Niçoise olives - pitted and chopped
1/4 cup blanched almonds - chopped
1/2 cup chives - chopped
1 tablespoon oregano - leaves only, chopped
Salt and pepper to taste
1/8 cup Olive Oil

Pre heat the oven to 350 degrees.

Cut the patty pan squash in half through its circumference. If using zucchini cut lengthwise in half. Scoop out 2/3’s of the pulp being careful not to make a hole in the bottom of the squash. Set the squash halves aside.

Chopped the pulp and mix with the goat cheese, olives, almonds, chives, oregano, salt and pepper. Divide the mixture among the squash halves and drizzle with oil. Place on a baking tray, and cook for 10 to 15 minutes. Serve immediately hot.

Sunday, July 1, 2007

...And, the living is easy


I like many people take an annual beach week becoming bronzed by days under the sun; laughing with friends at tea-time with cups that are never filled with tea, and being lulled to sleep by the crash of the surf against the sea wall – all becomes the visions and sounds of my seaside-holiday dreams.

The water and its creatures are the foods that feed this coastal sojourn.

Being a northeasterner, I find myself between Long Island and Cape Cod during this time, and inevitably a request comes for lobster. Curiously, lobster was one of those foods I could not stand as a kid. Maybe it was the fact that I would walk into a restaurant and immediately see these poor creatures occupying such wretched conditions -- so far removed from a natural setting -- climbing all over each other with pitifully bound claws. However, on the coast it changed for me --you walk down to the docks and watch the fishermen unloading their haul as the seagulls circled above, hoping for some discarded remnants to make a meal of. With the swirl of the marine zephyrs cooling my reddened body, I found these short-tempered fellows appealing.

After years of simply boiling or broiling these crustacean kings, I decided it was time for a new approach. Riding home with my basket full of large flailing claws, I wondered how I was going to cook this star of the evening's feast. The possibilities seemed confined to the usual cooking techniques -- then I thought, why not ...? I decided to boil the lobsters for just 5 minutes, as opposed to the standard 20 minutes, to end their misery. Then I would smoke them. As the sun started to cross a distance line, I collected seaweed along the shore, and after grilling the corn I laid the seaweed on top of the hot coals to create an impromptu smoker. I then placed the blanched, whole lobsters over the seaweed and tightly secured the lid. After 20 minutes I pulled these now crimsoned sea scavengers off the grill and split them open. Their meat was tender and cooked perfectly, and a mix of sea and smoke rose from their exposed underbelly. Accompanied with a spicy salsa, a simple mixed salad, slightly charred corn on the cob and a bottle of Napa Chardonnay we sat, dining al fresco, and gave thanks.

Here's to summer.


Lobster and Mango Salad with Sorrel Dressing – yields 6 to 8 servings

3 lobsters (about 1/12 pounds each)
2 cups water
2 cups white wine
1 vanilla bean – split down lengthwise
1 teaspoon whole black peppercorns
1 ripe mango
1/2 pound jicama – peeled and sliced julienne
1 hot house English cucumber

In a 12-inch high-sided pan that will accommodate the lobsters place the water, wine, and vanilla bean and peppercorns. Bring the mixture to a boil, and then reduce to a simmer and place in the lobsters. Cook the lobster for 16 minutes, covered. Remove the lobsters from the poaching liquid and let cool. Split the bottom side of the lobster tails to expose its meat with a pair of kitchen scissors and gently loosen the lobster from its shell. Remove the meat from the claws. Slice the lobster meat into about 1/12” to 2” medallions.

Peel the mango and remove the flesh from the seed. Slice the mango into 1/2” thin slices.
Arrange the ingredients on plate in an alternating circular pattern. Drizzle with the dressing.


For Sorrel Dressing...go tp June 2, 2007 entry.


Grilled Fruit Salad - yields 6 servings

1 small pineapple - peeled and cored
3 firm peaches - quartered
3 firm plums - quartered
1 pint cherries - pitted
1 pint Strawberries - quartered
1 tablespoon honey
1 lime - juiced
2 teaspoons chopped rosemary

Slice the pineapple into 1/2" pieces. Over a hot grill mark the pineapple, peaches, plums and on both sides. You should only cook the fruit for about 3 minutes on each side. Cool, and than cut the fruit into chunks and toss with remaining ingredients.